|
CLMS - Chicago Lodge Membership System Customizing Labels |

  
|
|
CLMS - Chicago Lodge Membership System Customizing Labels |
|
There are times when you may wish to customize a report/label or membership card, perhaps to move some information on a report or even to add some missing data to a report.
Labels
Step 1
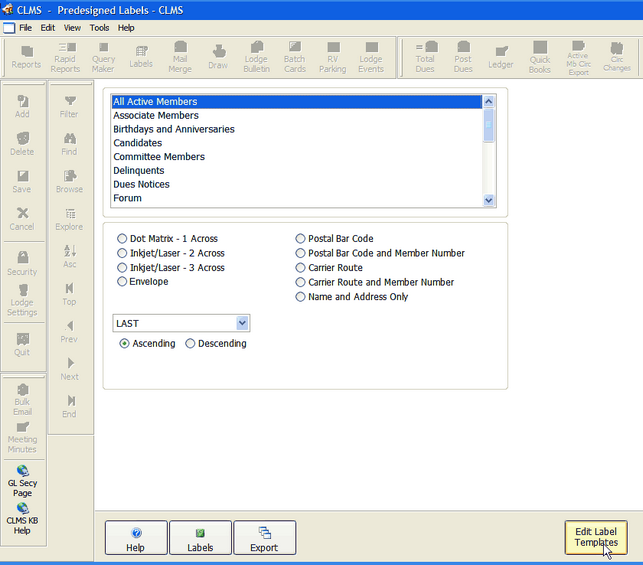
Start by clicking on the "Labels" button. You can also click the "Reports" or "Batch Card" button for customizing any of these reports cards or labels.
Step 2
Click the yellow "Edit Report Templates", button this will show you a list of all reports that you can create templates for. You will not be able to overwrite the original template, simply create a new copy template.
Step 3
Locate the report, label or membership card you wish to modify. For this example we have chosen to edit the "BITHELK" template which is the report for active elks birthdays for a specified month. Upon selecting this or any report you will immediately see a hint box specifying what you need to do to Edit the report.
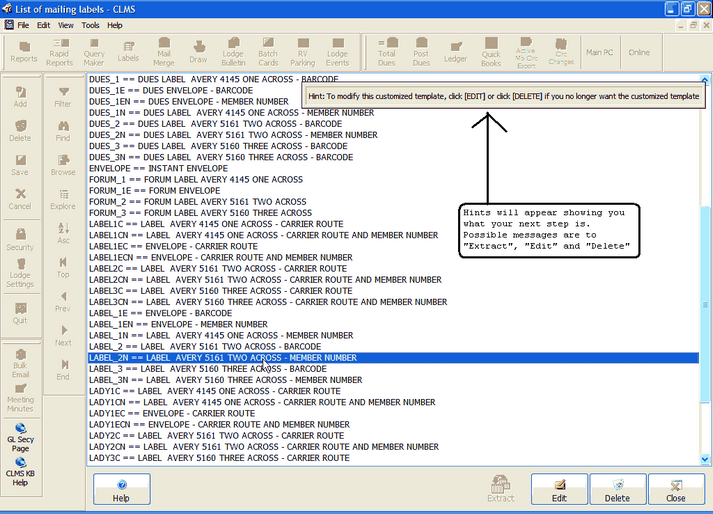
If this is the first time your creating a custom template for a label, you will need to click the "Extract" button after selecting the report, then the "Edit" button. When modifying a template you have already started working on then you will just need to click the "Edit" button. In the event that you have created a template you wish to get rid of you would click the "Delete" button. This will delete the template and you will go back to using the default for this particular report. Don't worry you cannot delete an original template.
Step 4
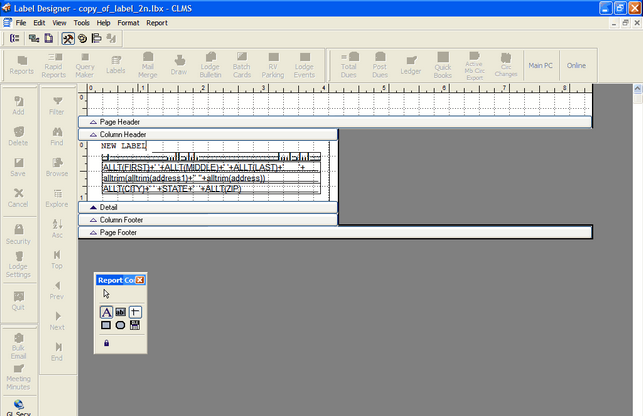
The report designer will open up where you will be allowed to make changes to the copy of the template. Notice that the title for the new label is "copy_of_label_2n.lbx". You will only be able to make changes to the copy and not the original.
We are simply gong to add the text "NEW LABEL" to this label. We used the label tool by clicking on this then using our mouse to select where we wish this text to appear. Simply type "NEW LABEL". Once you have added this text click the grey "X" below the red "X", To exit and save this new label.
Step 5
Make sure to save your changes, by clicking the yes button.
Step 6
Click the close button in the lower right hand corner to exit and return to the "Members Edit" screen.

See Also
Reference
Editing Membership or ID cards
Suggestions or bug reports about the CLMS product or help can be emailed to CLMS Helpdesk.
© B.P.O. Elks of U.S.A. All rights reserved.
Page url: http://www.YOURSERVER.com/index.html?custlabels.htm