|
CLMS - Chicago Lodge Membership System Simple Mail Merge |

  
|
|
CLMS - Chicago Lodge Membership System Simple Mail Merge |
|
This system feature allows you to create personalize letters for a selected member or a particular group of members.
Using Simple Mail Merge
Step 1
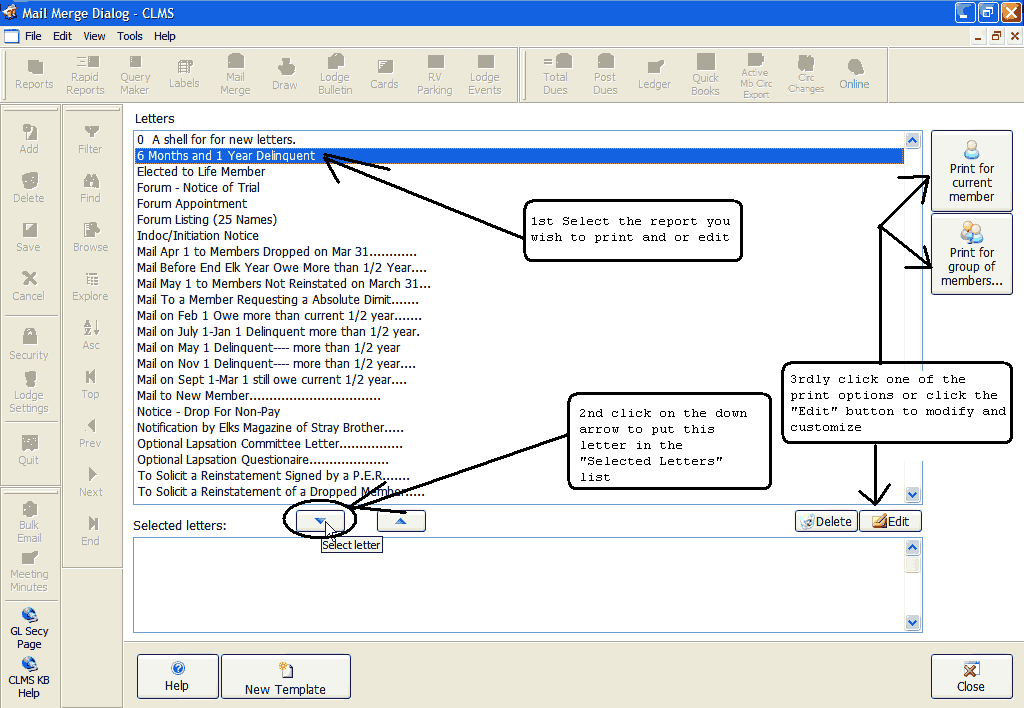
Locate the Mail Merge button on the Reports and Labels Toolbar and click it. (See the image below.)

Step 2
Once the Mail Merge Dialog has displayed, select a mail merge template from the list provided by left clicking the mouse for the desired letter. Locate the down arrow and click it as shown below, this will have the effect of moving the selected letter into the Selected letters box. Finally you can "Print for current member" or "Print for group of members".
It is recommend to print for current member initially to see a print preview and verify that the letter looks the way you want. Once your sure you can print for group if desired. If you wish to edit the letter's contents click the "Edit" button to modify. See section below "Editing Mail Merge Letters"
Step 3 Can skip this step if not selecting groups
Print for group of members
If you have selected to perform a mail merge for a group of records after clicking the button to do so, you will be presented with typical options for this selection. Select from the list of groups you can choose from set any sorting and special include options then click the "Merge" button to continue.

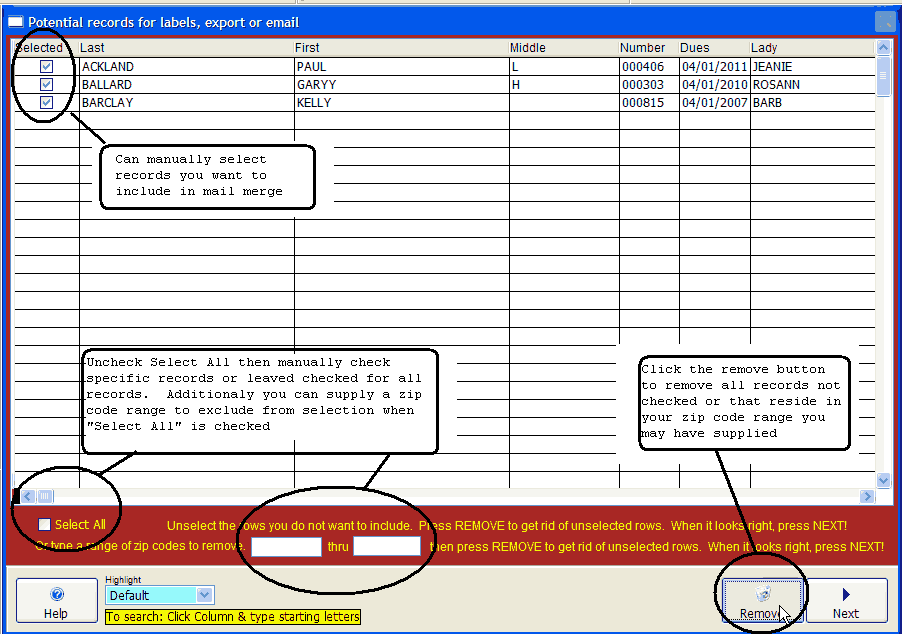
You will now have the opportunity to choose which records in your group you want to include.
| • | Use the Select All option to check or uncheck which all records as needed |
| • | Manually check off records you want to include or |
| • | Provide a zip code range you want to exclude from your selection |
| • | Click the Remove button when done this will remove all unchecked records or records that are within your zip code range. |
| • | Finally click the Next button to preview your mail merged |
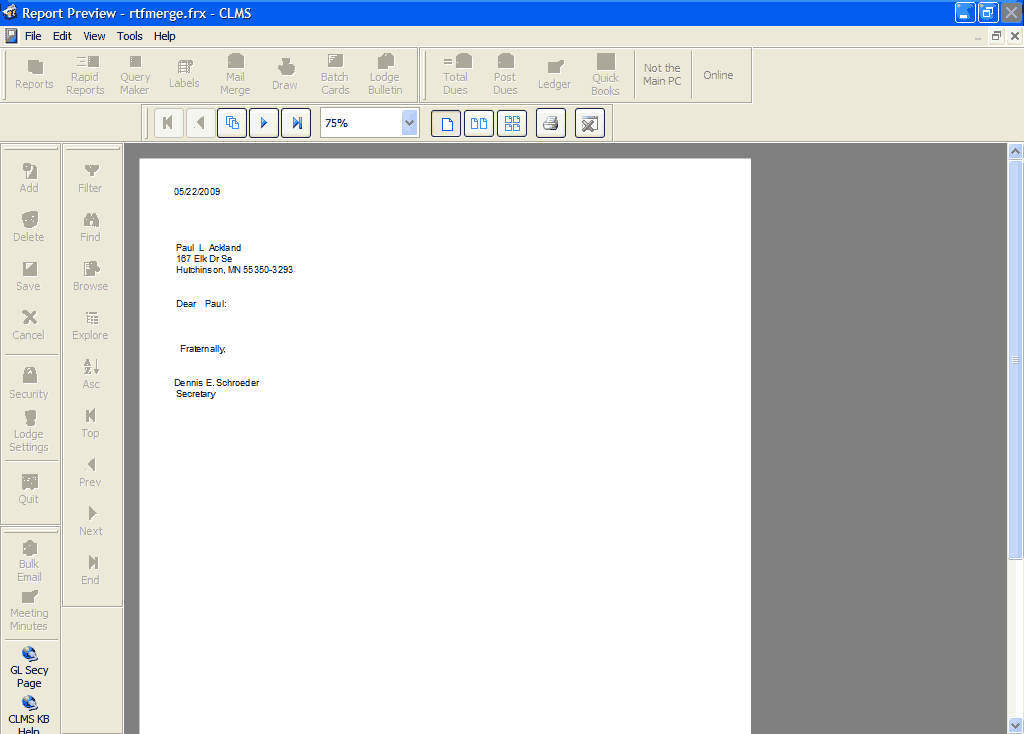
Will see a preview of your merged letters
Step 4
Editing Mail Merge Letters
Note that when you select a letter and choose to Edit it you will be taken into the letter editor. There is virtually no top margin and very little left margin, so you will need to add your own lines and spaces for the margins
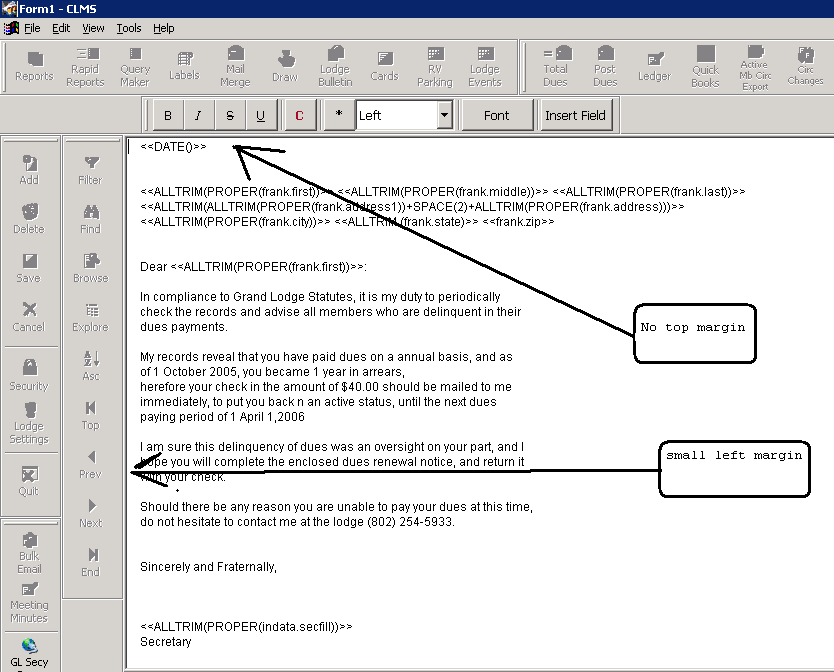
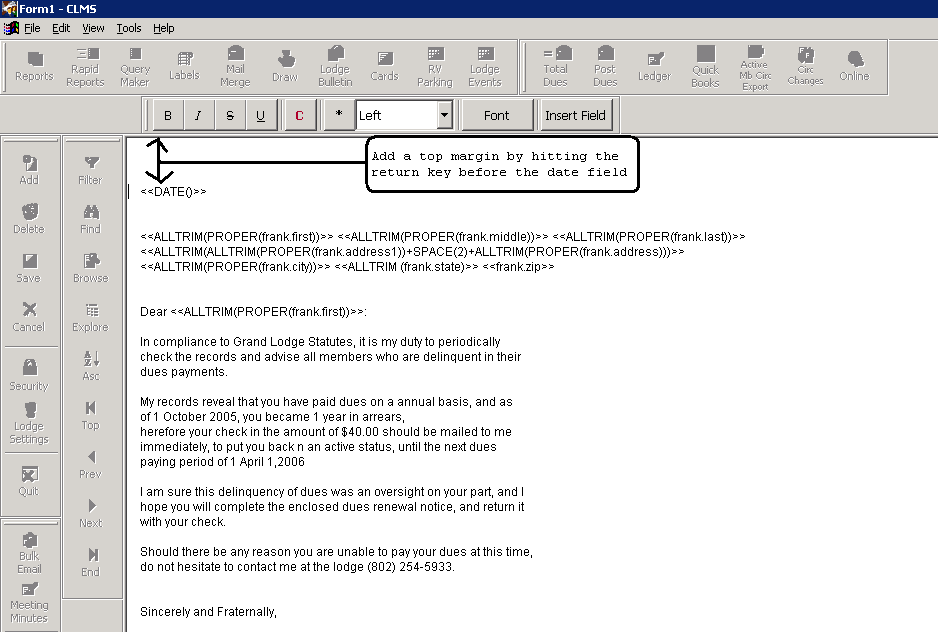
Adding Top Margin
You add a top margin by hitting the "Return" key on the keyboard before the date field as indicated below.
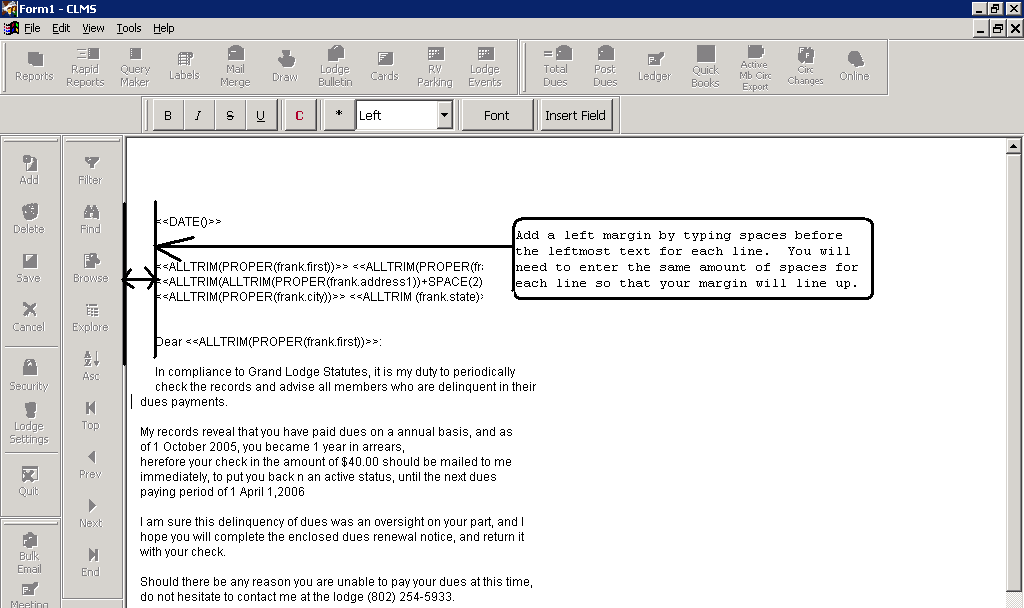
Adding Left Margin
You will need to enter spaces before the left most text on each line to create your left margin. This must be done for each line and the number of spaces must be the same so that the margin will be consistent. To create a new line simply hit the "Enter" key at the end of each line.
Make sure you save the document.
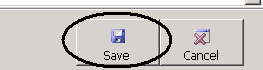
Please note the toolbar that is preset above the screen as well as the way in which data is merged into the letter using the << and >> characters. Edit the text in the edit box and add any formatting changes you desire using the toolbar, then click the Save button to save your changes.
See Also
Reference
![]()
Suggestions or bug reports about the CLMS product or help can be emailed to CLMS Helpdesk.
© B.P.O. Elks of U.S.A. All rights reserved.
Page url: http://www.YOURSERVER.com/index.html?mailmergesimple.htm