CLMS allows you to share data with QuickBooks, by transferring files from CLMS into a IIF file type that can read by QuickBooks. Accounts must match in both the QuickBooks application as well as the CLMS Grand Lodge Chart of Accounts see Grand Lodge Chart of Accounts.
Below will be demonstrated how to create the IIF file from CLMS, that gets imported into QuickBooks. Then how to take this file and import into QuickBooks.
Creating IIF file, from CLMS for import into QuickBooks.
QuickBooks IIF exports will now produce the selected transactions sorted and grouped by debit account, to minimize the number of journal entries created in QuickBooks and to produce a self contained list of the offsetting credits within the same journal entry. The IIF file will contain a journal entry for eah debit account involved in the dues and fees transactions coming out of CLMS1.
Step 1
Click on the QuickBooks button that is provided on the Toolbar to open the Accounting screen that allows you to create reports and files that will work with QuickBooks. (See image below.)

Step 2
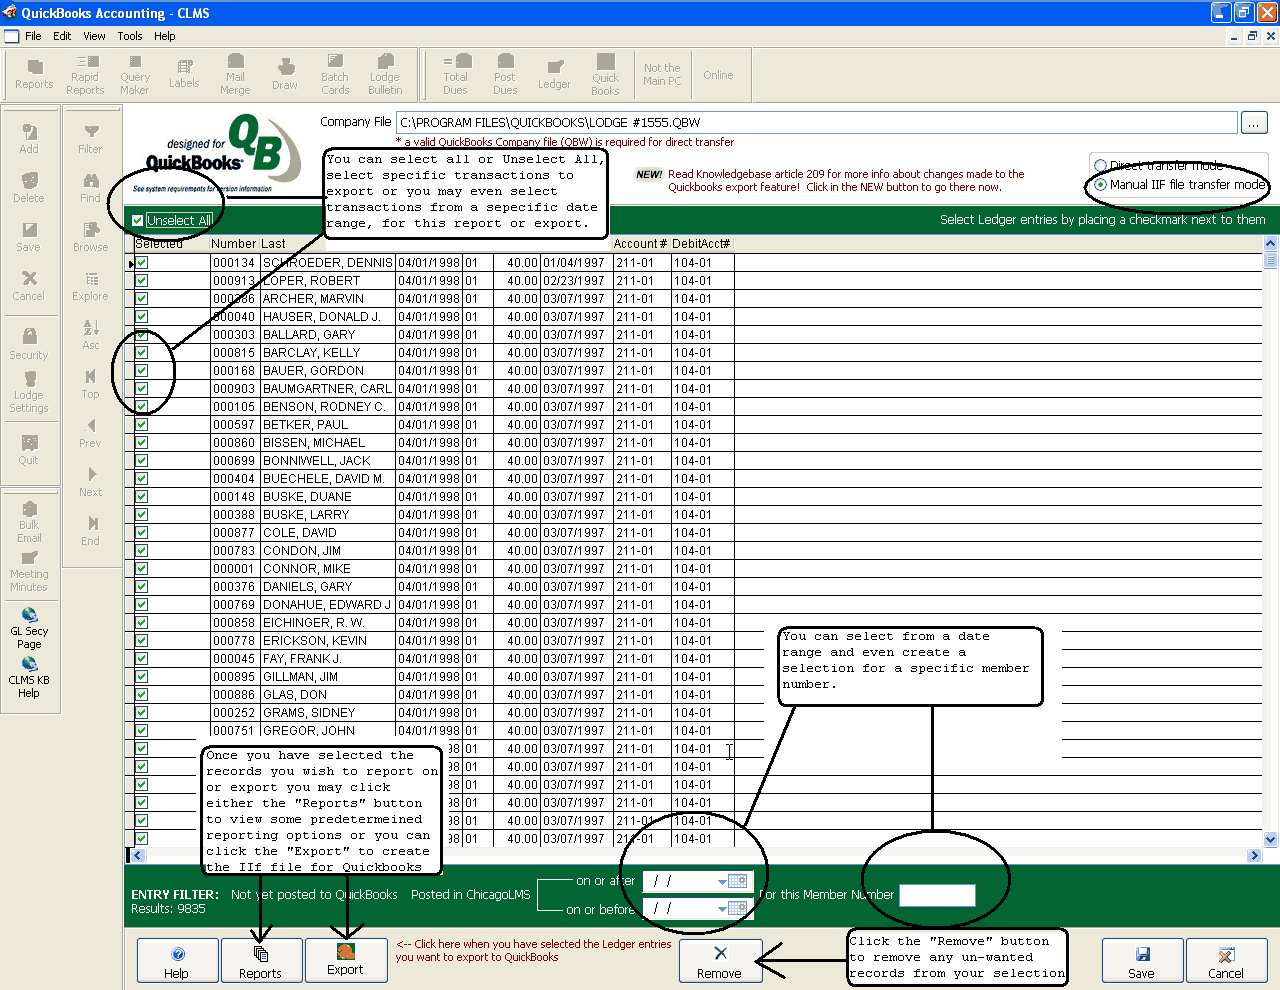
This will open up the following screen which provides a way to export transactions to a QuickBooks import file (IIF). On this screen you will be provided with a way to select specific transactions for exporting or reporting on.
About Ledger Entries
If you look in the grid you will see all of the ledger entries that have been made in Chicago Lodge Membership System. Selecting ledger entries to be posted to QuickBooks is simply a matter of checking the check boxes next to the desired entries or checking the 'Select All' checkbox if all entries are to be posted.
You can filter the entries shown by using the date picker controls that are in the bottom middle of the screen. These allow you to only display ledger entries that were posted 'on or after' a particular date or 'on or before' a particular date. If a range of ledge entries is desired you can fill in both date picker controls and only ledger entries that were posted between the two date will be displayed in the grid.
To display entries for a particular member you can type the member's number in the field provided at the lower left of the screen just to the right of the date picker controls. Only ledger entries that meet the criteria you have selected in the Entry Filter area will be shown in the grid. Ledger entries that have been previously posted to QuickBooks or have been removed using the 'Remove selected entries' button will not be shown or displayed in the grid regardless of the criteria you set up in the date picker controls or member number field. This prevents entries from being posted more than once to QuickBooks.
| • | 1st check off the records you wish to export, you may use the Unselect/Select all to add or remove check marks from all records. |
| • | Make sure that the "Manual IIF file transfer mode" is selected. |
| • | Click the "Reports" button to view/print a "Journal Entry", "Report by Member #" or "Report by Date Type Memb#" |
Step 3
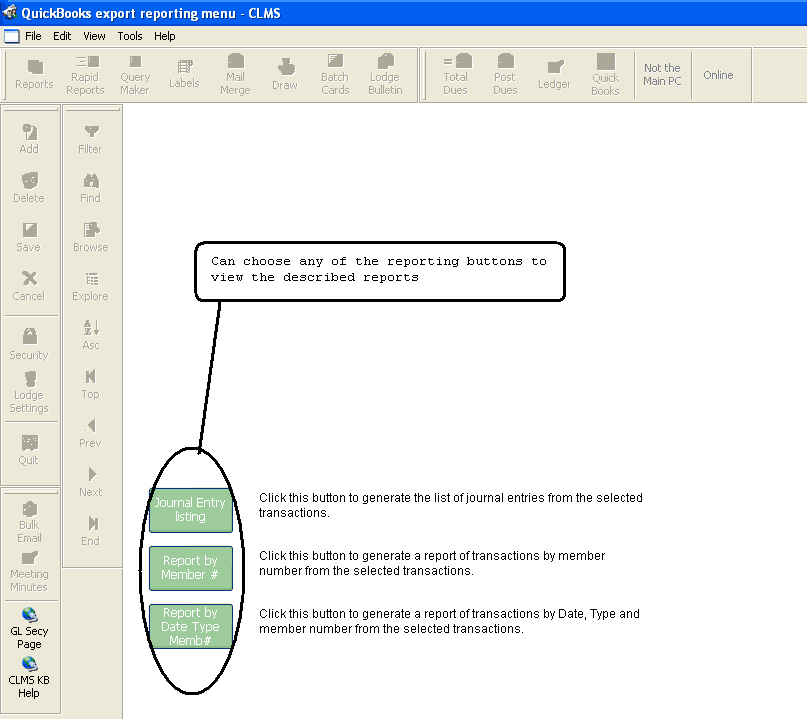
If you have clicked the "Reports" button you will be presented with 3 basic reports to review your transactions.
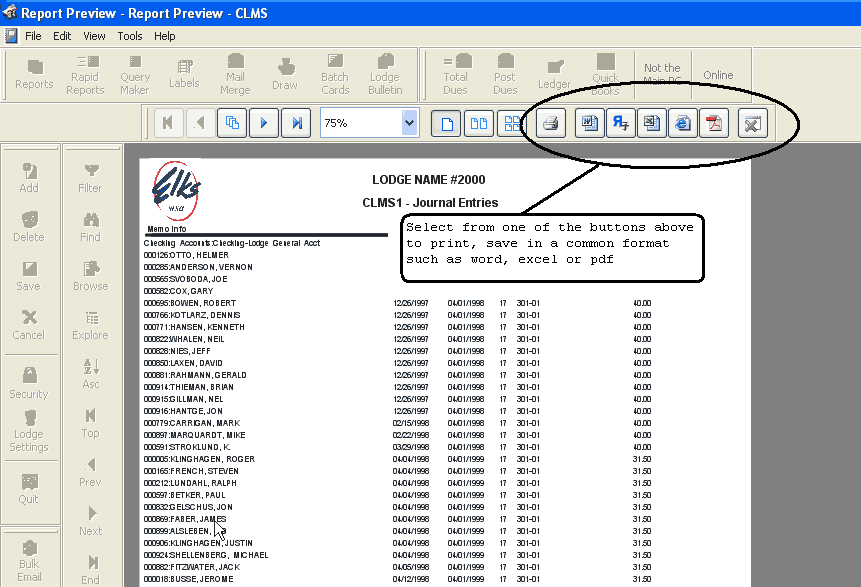
Below is a sample of the "Journal Entry listing" report you may print or save this file in a different format by using some of the buttons provided on the toolbar. Close the preview of the report once done to be taken back to the transaction page.
Step 4
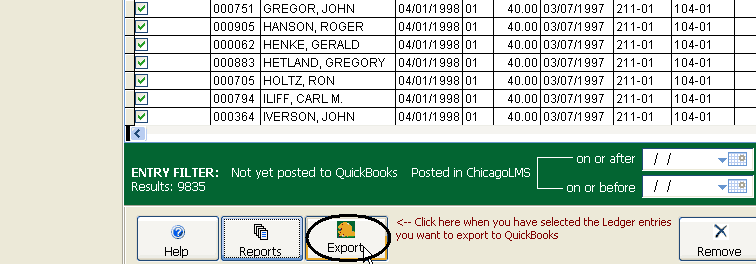
Click the "Export" button to create the IIF file for import into QuickBooks
Step 5
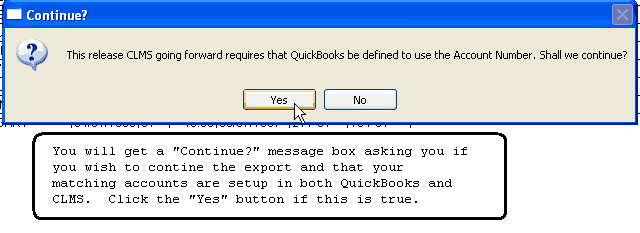
Click the "Yes" button to verify that you are sure that matching accounts are setup in both Quickbooks and CLMS. Click the "No" button if you still need to verify the accounts in either application.
Step 6
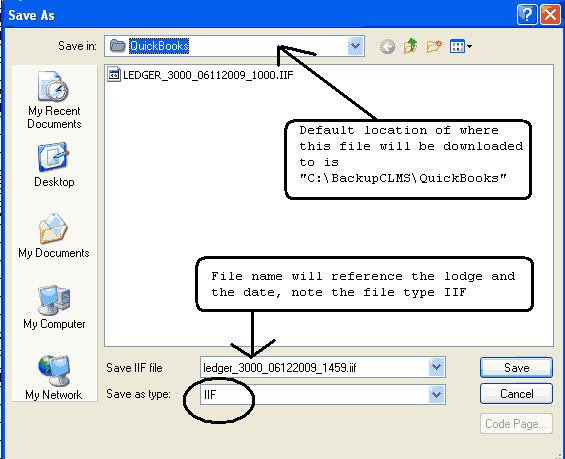
You will see a "Save As" screen to save the IIF file. The default location for saving the file is "C:\BackupCLMS\QuickBooks". The file type is set to "IIF" and you will notice that the file is named using the the lodge name, the date and military time followed by the "IIF" file extension. Click the "Save" button once your ready to save the file.
Step 7
You should see the "IIF export successful" message box. Click the "OK" button to continue

Step 8
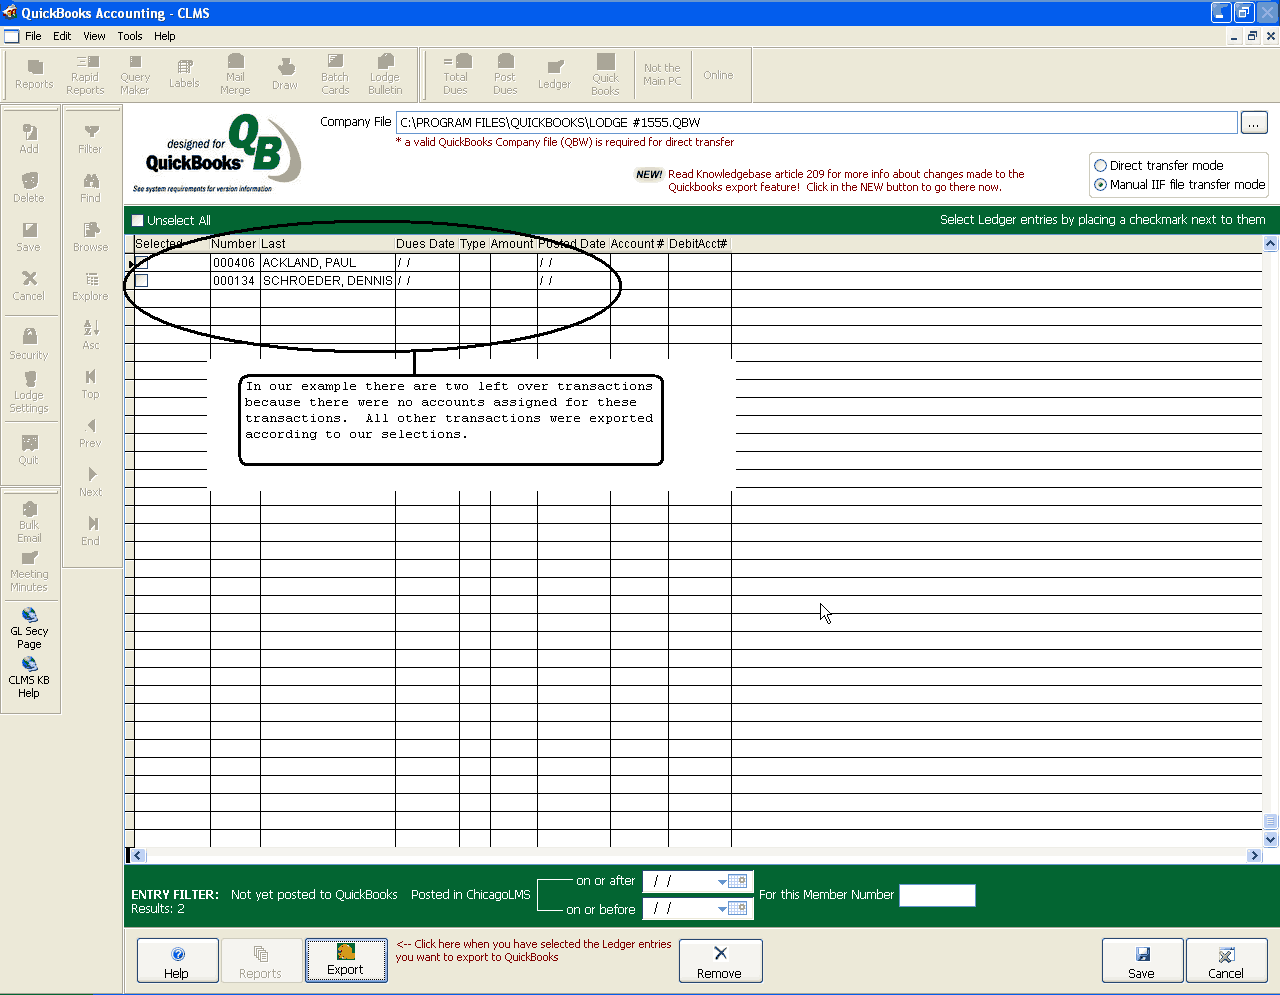
In our example below there were a couple records that did not get exported into the "IIF" file, because no account number was assigned to them. You may close CLMS at this time, you will later return to CLMS to mark the records as imported after they are imported into QuickBooks but this will be covered in the next process Importing IIF File into QuickBooks
Importing IIF file into QuickBooks.
Step 1
Locate the QuickBooks application on your computer and launch

Step 2
Review your Chart Of Accounts to make sure they match what you have set in CLMS. To view where to setup Chart of Accounts in CLMS see Manage Chart Of Accounts to see a listing of Chart of Accounts in CLMS see Grand Lodge Chart of Accounts
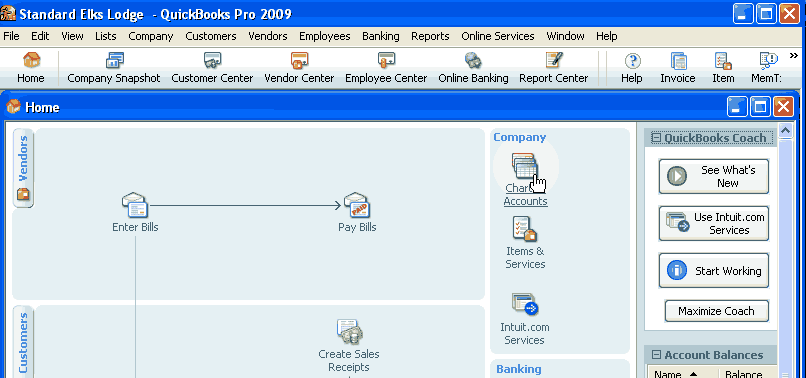
Use this screen to manage Quick Books Chart of accounts. 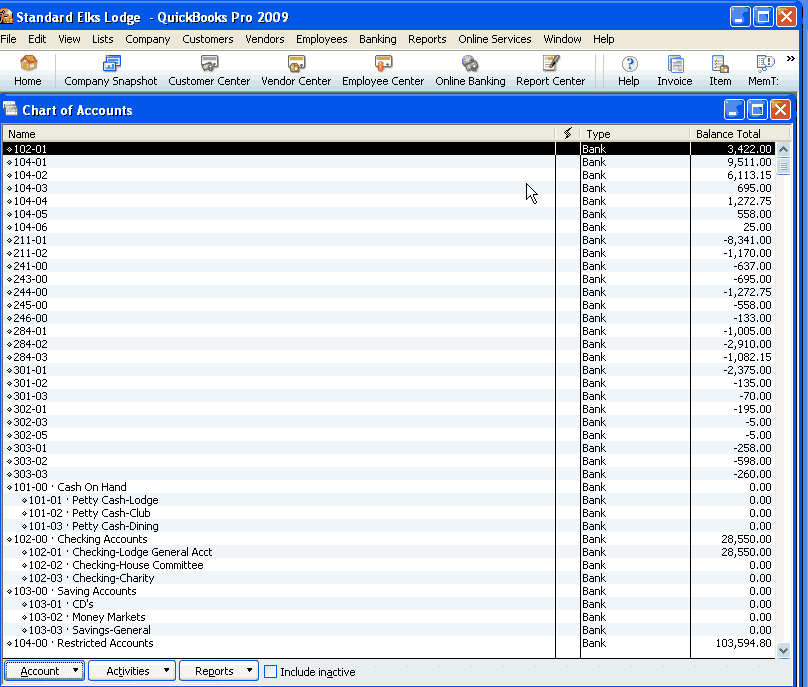
Step 3
Now that you have verified that the Chart of Accounts are set correctly in both Applications, On the "Edit" menu select "Preferences".
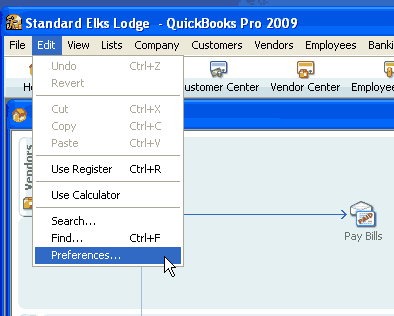
Step 4
Select "Accounting"
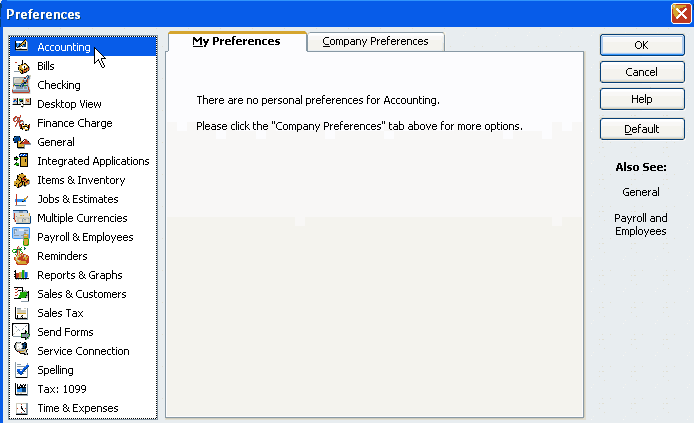
Step 5
Select the "Company Preferences" tab, make sure that "Use account numbers" and "Require accounts" are checked.
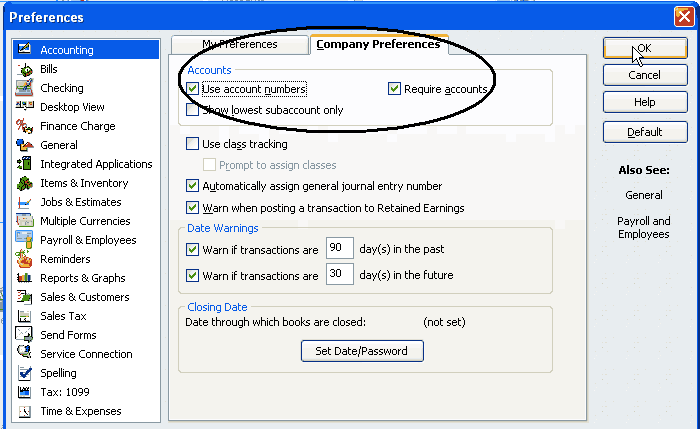
Step 6
From the "File" menu select "Utilities", "Import", "IIF Files..."
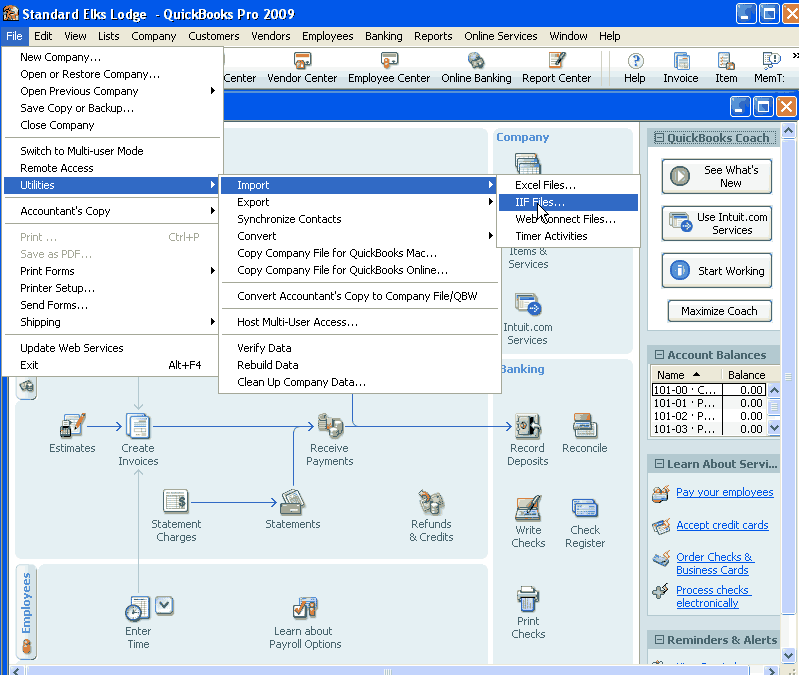
Step 7
An "Import" box will appear select the file you wish to import from the "C:\BackupCLMS\QuickBooks" folder.
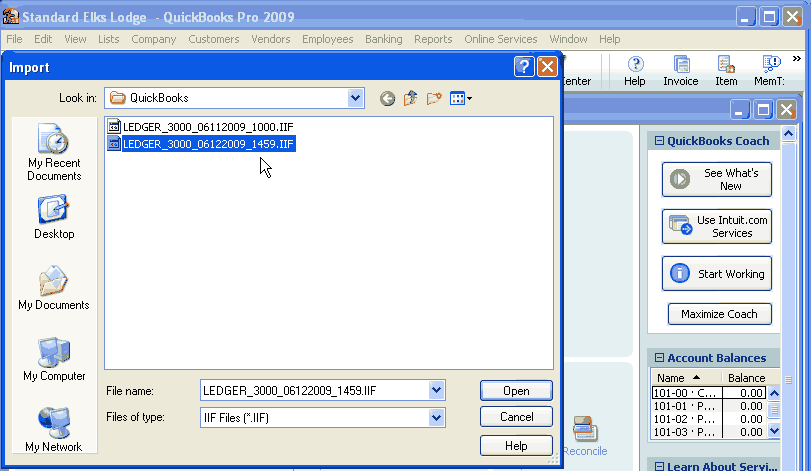
Step 8
You will view a "Working" box showing the status of the import.
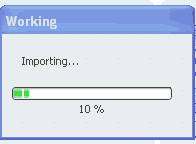
Step 9
A "QuickBooks Information" window will appear click "OK".
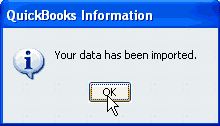
Step 10
If your import was successful you will want to mark the transactions as imported. Return the CLMS application and click the "Save" button to mark the transactions that you imported. You will presented with a warning message about marking the transactions as imported. Click the "Yes" button if you were successful in importing into QuickBooks.
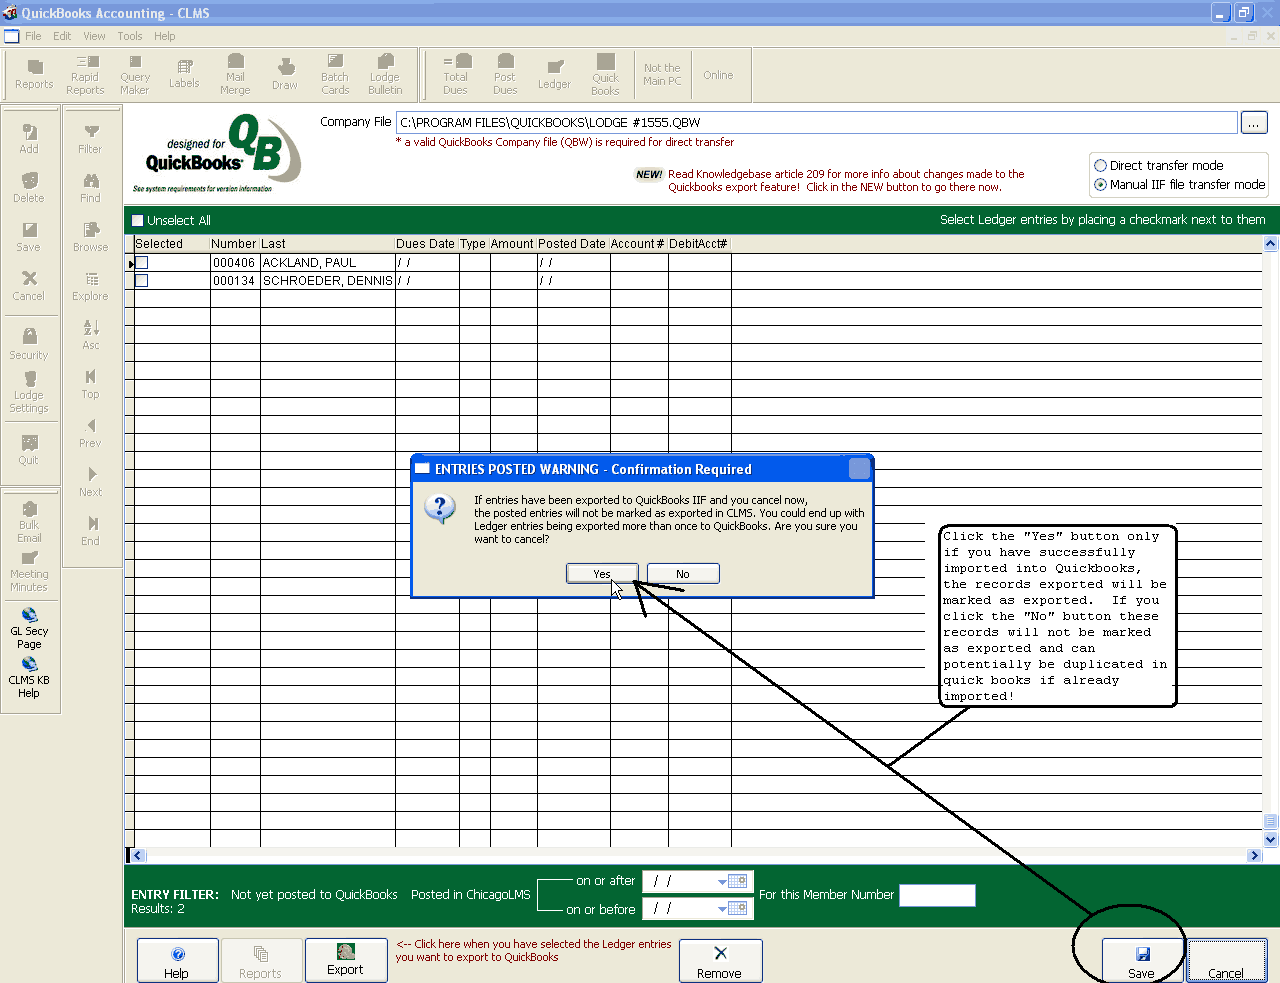
Posting Entries to QuickBooks
Once you have check marked the ledger entries you want posted to QuickBooks you can click the 'Post selected entries to QuickBooks' button at the bottom right of the screen. In the case of QuickBooks Pro or above this will post the entries directly to QuickBooks. In the case of QuickBooks Basic or below this will generate an IIF file that can then be imported into QuickBooks using QuickBooks' import features.
When the system is done posting the ledger entries to QuickBooks or generating the IIF file, it is a good idea to double-check that everything is correct in QuickBooks. Once you have verified that the information is as it should be over in QuickBooks then click Save on the screen above. THIS IS VERY IMPORTANT: Do not forget to click the Save button if the ledger entries were successfully posted to QuickBooks. The only time you should not click the Save button is if a problem was encountered when posting the entries to QuickBooks, in which case you would click the Cancel button. FAILING TO CLICK THE SAVE BUTTON WILL CAUSE THE SELECTED LEDGER ENTRIES TO REMAIN DISPLAYED AND THEY CAN BE EXPORTED AGAIN WHICH CAN CAUSE DUPLICATE ENTRIES IN QUICKBOOKS.
Removing Selected Entries
At the bottom of the screen is a 'Remove selected entries' button. This should be used with extreme caution as it will remove entries from the displayed list without actually posting them to QuickBooks. This can be useful when you don't want to ever post entries to QuickBooks that happened before a certain date for instance. In that case you would enter an 'On or before' date in the date picker at the bottom of the screen (Entry Filter area) and then check the Select All checkbox to select all of the ledger entries that occurred on or before a certain date. Then you would click on the 'Remove selected entries' button to make sure they were never displayed in the grid again. This does not actually remove the ledger entries from your CLMS - Chicago Lodge Membership System and they will still be visible from the Ledger and Payments screens. It simply marks them as exported without actually exporting them to QuickBooks so that you don't have to keep filtering those records out whenever you are creating an IIF export file for QuickBooks.
See Also
Reference
![]()
Suggestions or bug reports about the CLMS product or help can be emailed to CLMS Helpdesk.
© B.P.O. Elks of U.S.A. All rights reserved.
Page url: http://www.YOURSERVER.com/index.html?screenquickbooks.htm