|
CLMS - Chicago Lodge Membership System How to: Browse the Membership Roster |

  
|
|
CLMS - Chicago Lodge Membership System How to: Browse the Membership Roster |
|
Browsing the membership roster in CLMS - Chicago Lodge Membership System is a quick and easy way to view and navigate a group of members. You will need to perform the following steps.
Browsing Membership Roster
Step 1
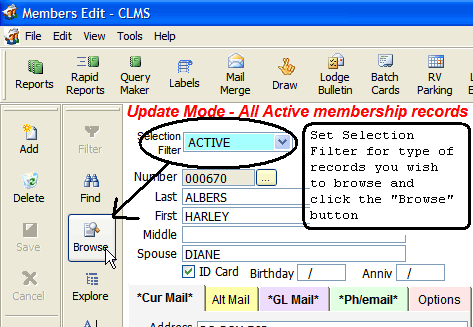
To limit the records you have to browse through set the "Selection Filter" to the type of records your looking for. Keep in mind that once you click the "Browse" button you will only see records of the type set on "Members Edit", "Selection Filter". Below it is set to "Active" so only active records will be viewed.
Click the "Browse" button located on the left of the current record.
Step 2 Locating and Editing a record.
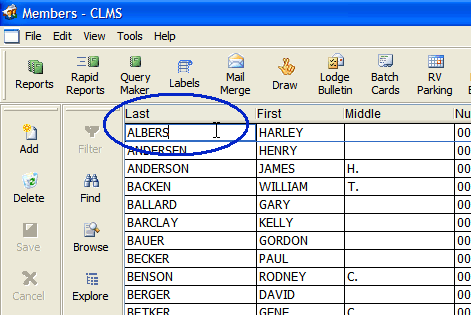
After clicking the Browse button you will be presented with a grid of all the records currently selected by the "Selection Filter" on the previous screen. You can navigate this browse using the mouse, arrow keys or by typing in context text while the grid of records has focus. See the image below.
Below we have clicked on the "Last" field of the first record.
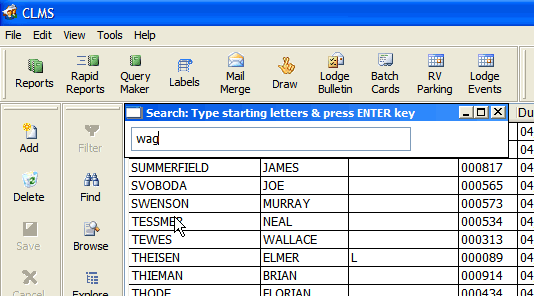
Start typing as much of the last name or what ever value needed in the field you have chosen to search. A "Search by first symbols" window will appear hit the "Enter" key when you are done.
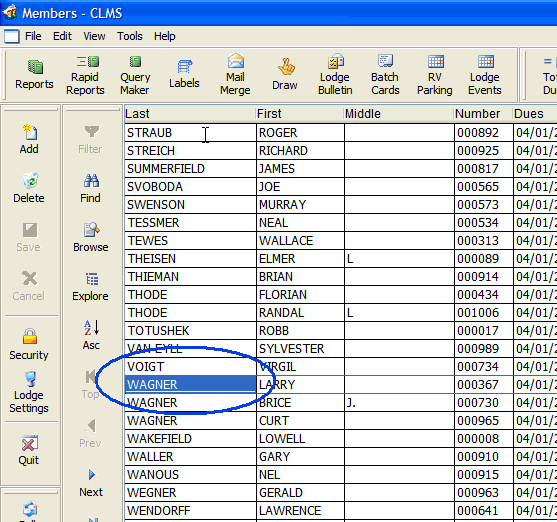
The first record matching what you have typed will have the focus like shown below.
If you wish to edit one of the columns of the selected record you may select the field you want to edit and click the "Edit" button on the toolbar below.
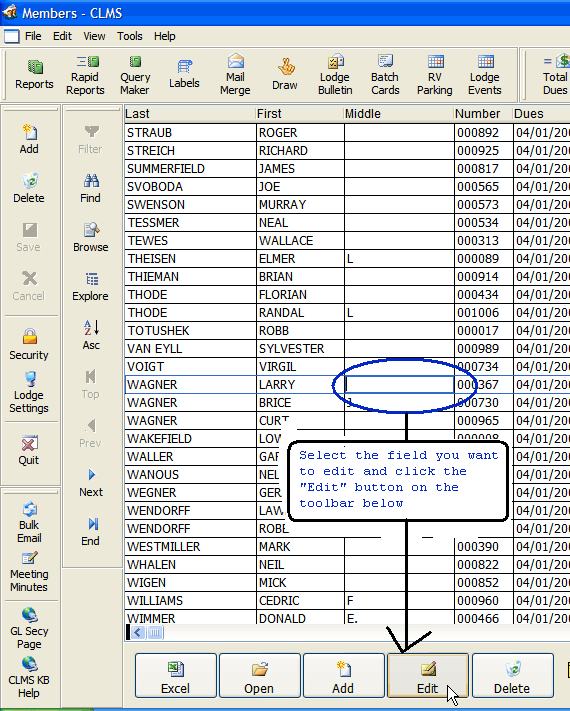
Click the "Edit" button again when finished editing, this turns off editing capabilities. Note that the button has changed colors to yellow to indicate that it is in edit mode and back to grey when not.

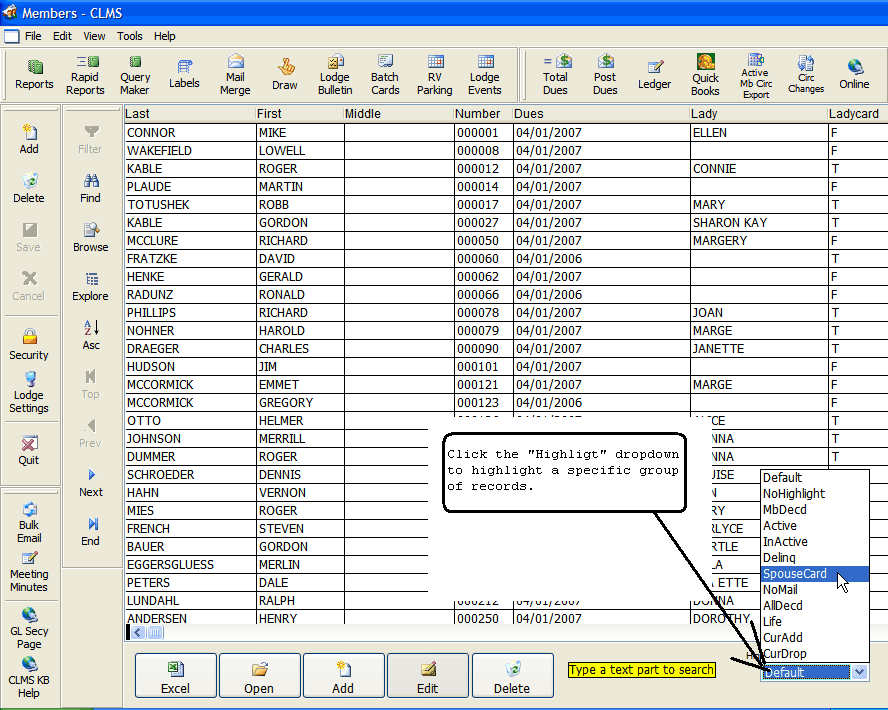
Step 3 Using the Highlight feature to highlight specific records.
Click the "Highlight" filter to highlight specific groups of records. In the example we are looking for "Active" records that have the "Id Card" option checked off on the "Members Edit" screen. Remember the list will contain only records based on the "Filter" drop down on the "Members Edit" screen.
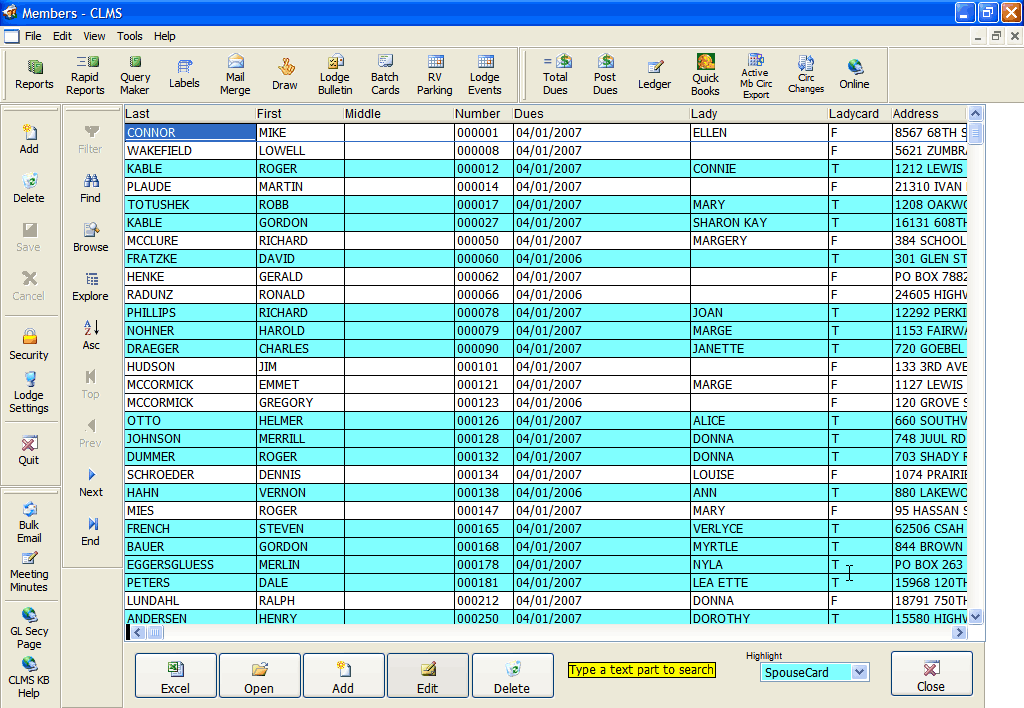
All the records matching the criteria above will turn blue to make these records easily identifiable.
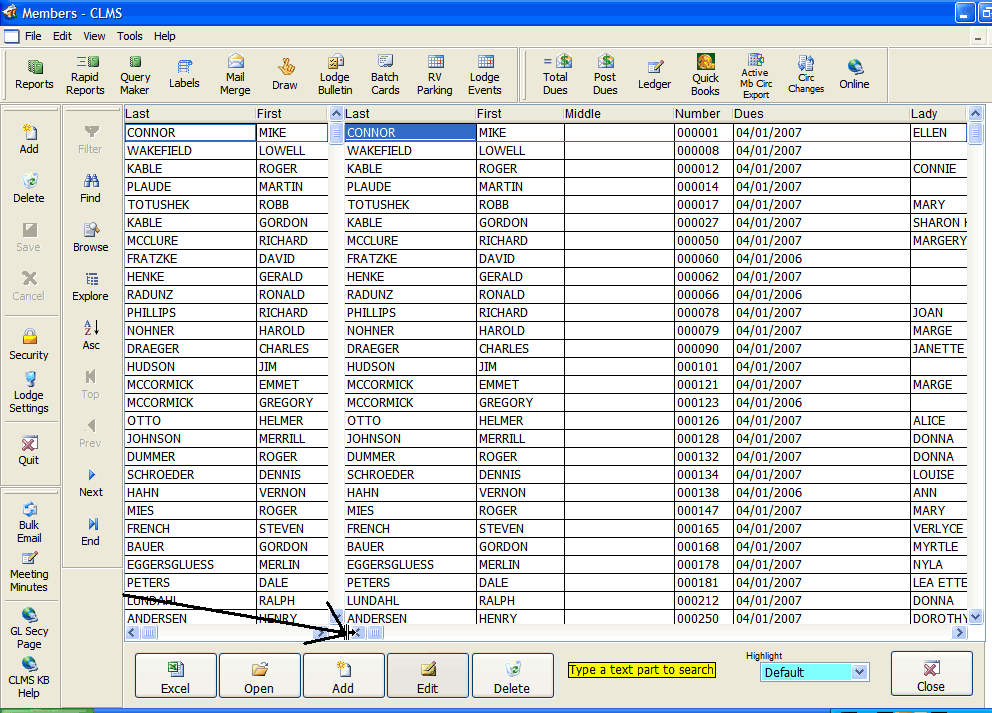
Hint to browse fields without losing the last name field.
In lower left most corner of the "Last" name column left click on your mouse while holding down this button drag it to the right. You can repeat this process and drag it further to the right if you are not seeing enough of the Last name or if you want to also see the First name.

You can drag it for as many columns as you want to keep visible now you can access all fields without loosing the Last and First names.
Along the bottom of the browse screen is a series of buttons. From left to right they are as follows:
| 1. | Excel - Used to export the current browse list of members to Excel for further processing. |
| 2. | Open - Used to close the current browse list and display the selected member in the Membership screen |
| 3. | Add - Used to add a member to the membership roster. This feature should only be used by advanced CLMS - Chicago Lodge Membership System users that know what they are doing or have been directed to do so by Chicago Lodge Membership System. |
| 4. | Edit - Allows membership information that is shown in the browse list to be edited. This feature should only be used by advanced CLMS - Chicago Lodge Membership System users that know what they are doing or have been directed to do so by Chicago Lodge Membership System. |
| 5. | Delete - Allows you to delete a member from the list. This feature should only be used by advanced CLMS - Chicago Lodge Membership System users that know what they are doing or have been directed to do so by Chicago Lodge Membership System. |
| 6. | Close - Closes the Browse screen and returns you to the previously open screen which is usually the Membership screen. |
Move a Column From while in Browse Mode
You may also change the order that columns are displayed in from the Browse window.
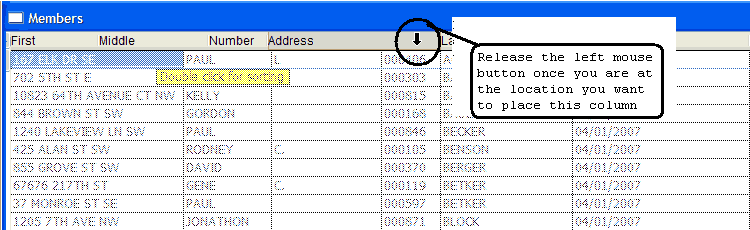
Select the column you wish to move. While holding the left mouse button down drag this column to a new position. The column will then be moved to the right of the new column you select.
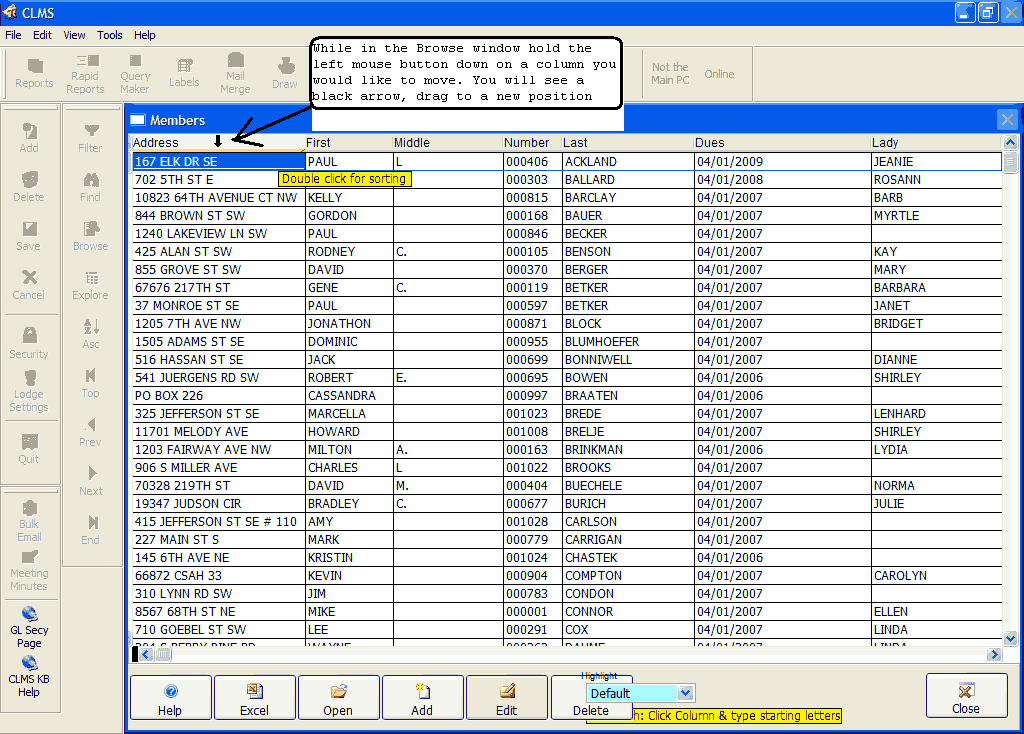
The Columns will appear to fade while holding the left mouse button down locate another column that you want to drag the selected column to the right of. In the example will we drag the Address Column to the right of the Number column.
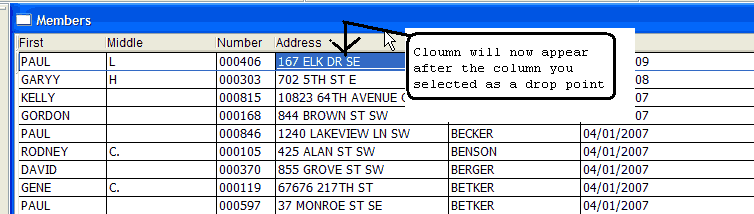
The Address column will now appear to the right of the Number column.
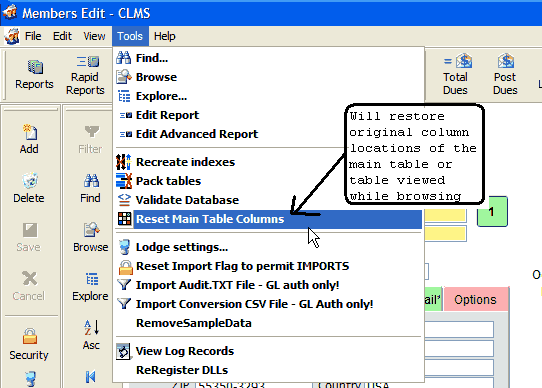
Reset a Columns to Original Locations
To restore the main table/browse columns simply click the "Tools" menu and select "Reset Main Table Columns"
See Also
Tasks
How to: Search for Information
Reference
![]()
Suggestions or bug reports about the CLMS product or help can be emailed to CLMS Helpdesk.
© B.P.O. Elks of U.S.A. All rights reserved.
Page url: http://www.YOURSERVER.com/index.html?howtobrowsethemembershiproster.htm