Step 1
Any of the Labels provided from this list, can be exported to a text file. Simply click the "Export" button. On the Label option page.
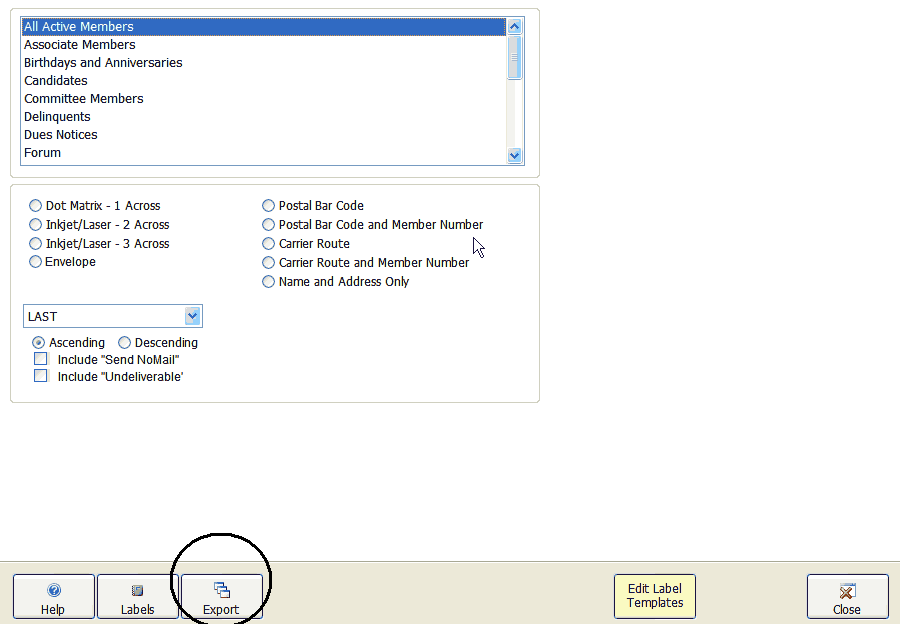
Selecting records to Export
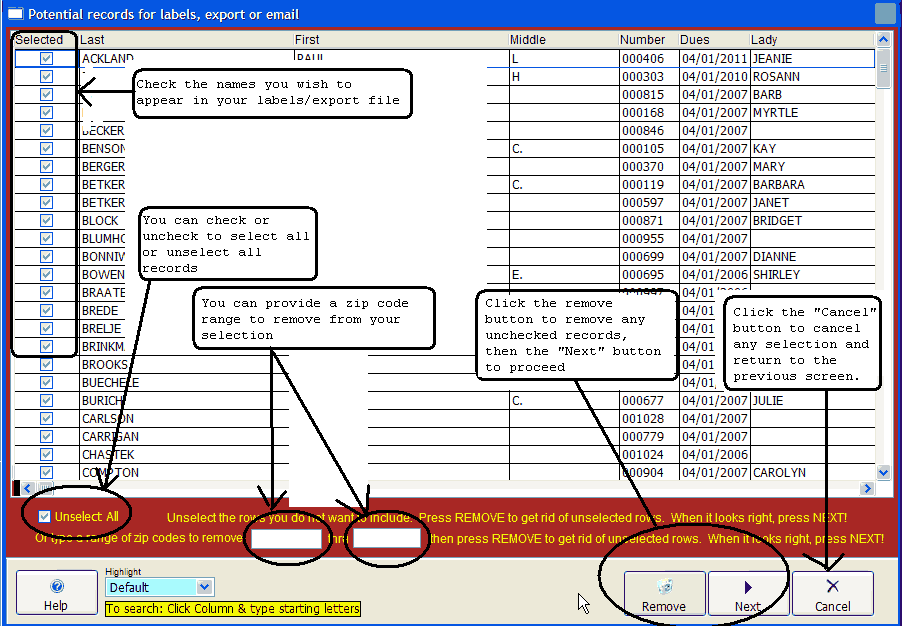
| 1. | After clicking the "Export" button shown on the form above, you will be taken to a page to select the records that you wish to export or print labels for. You can go through the list and uncheck any records you wish to omit from your export/label. Or you can uncheck the "Select All" option shown below, then check only the records you want. |
In this example we will select only records that have a last name that begins with the letter B. First uncheck "Select All" option at the bottom of this page to uncheck all records. Then manually check off the records you want to include. In this case, all the Last names starting with B.
Finally click the "Remove" button, this will remove any unchecked records from the screen and your selection. Click the "Next" button to preview your selection and print.
Step 2
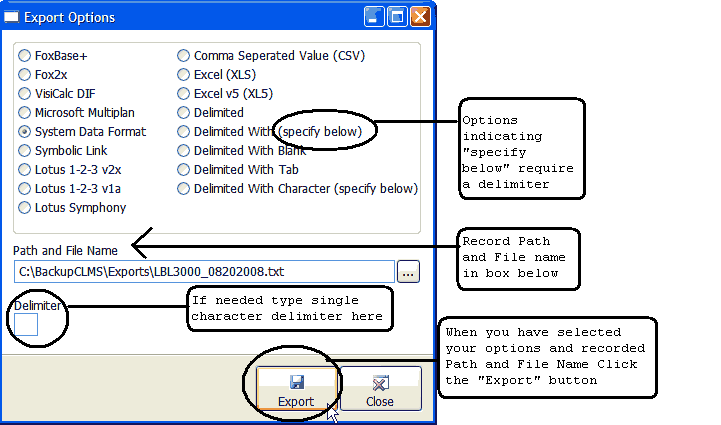
You will then see a window for many commonly used export options, select the option you wish to use. Note that if you select one of the export options that is followed by "(specify below)" then you must enter a single character delimiter you wish to use. A delimiter identifies how the fields contained in each record are separated.
Commonly used as delimiters are single quotes ', double quotes " and commas ,. However you can use what ever you want. Record the Path and File Name so that you can locate the file you are creating.
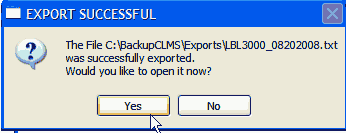
In our example below the Path and File Name is "C:\BackupCLMS\Exports\LBL3000_08202008.txt"
Step 3
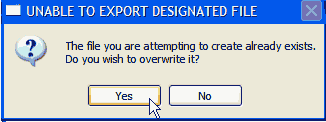
If the file you are creating already exists you will get a message box prompting if you want to overwrite the file. Click the "Yes" button if this is what you want to do.
Step 4
Once the file is created you will be prompted to open the file this will also be a good time to save the file to another location if you choose to do so. Click the "Yes" button to open and view the file.
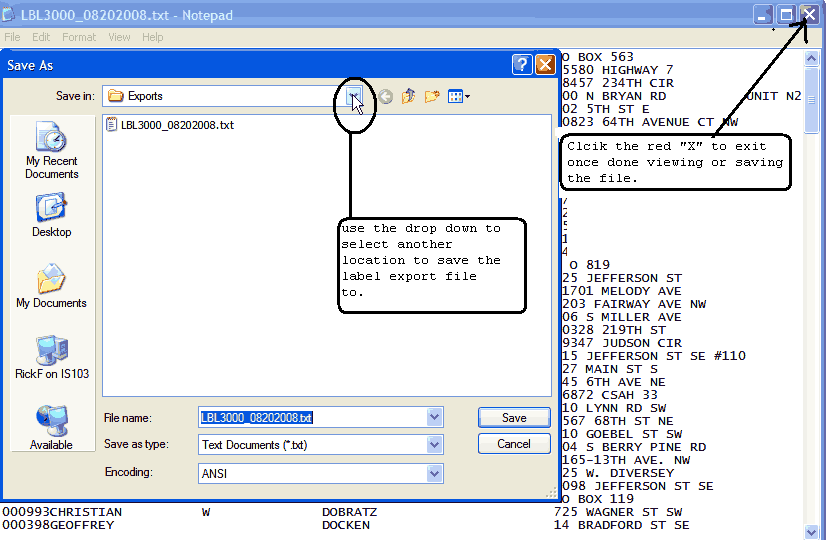
To save to another location click on the "File" menu then select the "Save As" option. You can now use the drop down menu to change the location from "Exports" to some other location of your choice. Keep in mind that you are saving a copy of the file so the original should still be found in your "C:\BackupCLMS\Exports" folder.
Locating Your Export Files
Step 1
Locate and double left click on the "My Computer" icon on your desktop.
![]()
Step 2
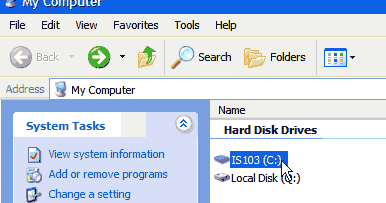
Locate the "C:" drive double left click on the drive
Step 3
Locate the "C:\BackupCLMS\Exports\" directory. Locate the file your looking for select that file and copy it. You can copy by right clicking on the file and selecting the "Copy" option. This file can now be pasted to any location you wish.

See Also
Reference
Suggestions or bug reports about the CLMS product or help can be emailed to CLMS Helpdesk.
© B.P.O. Elks of U.S.A. All rights reserved.
Page url: http://www.YOURSERVER.com/index.html?exportinglabels.htm