|
CLMS - Chicago Lodge Membership System Automated CLMS Updates |

  
|
|
CLMS - Chicago Lodge Membership System Automated CLMS Updates |
|
Automated Updates to CLMS1 - Chicago Lodge Memebership System
Periodically Updates to CLMS1 will become available and the program will advise updates are available. It is important that you perform Backups on a regular basis prior to updates. Additionally it is important that you allow updates to install when they become available, so that your version of CLMS1 can remain current and take advantage fixes and enhancements.
Section 1 - Regular Install
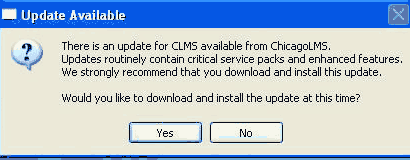
| 1. | After launching CLMS1 you may get an Update Available message box. This message indicates that there is an update ready to install to your version of CLMS1. If you have a recent backup, it is recommended that you click the Yes button and let the update install so that your system will be current. If you choose not to install at this time and click the No button instead see section below Section 2 - Not Installing Now |
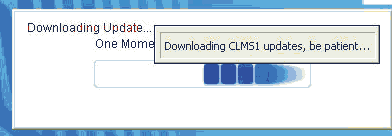
| 2. | You will then see status box appear briefly indicating that the CLMS1 updates are being downloaded |
| 3. | You will see a Update Downloaded message box click the OK button |

| 4. | At this time you may experience a File Error message box if at anytime after this point you do encounter this message box with Abort, Retry and Ignore buttons, click the Ignore button and REBOOT OR RESTART YOUR COMPUTER AND PROCEED TO Section 3 at the end called Section 3 File Error IF NO ERROR proceed to step 5. |
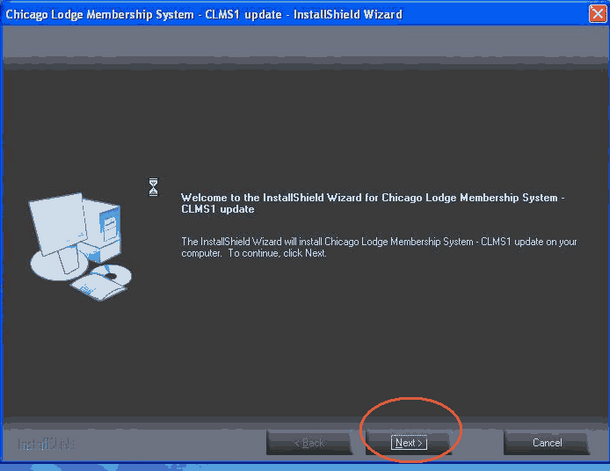
| 5. | Click the Next button to continue. |
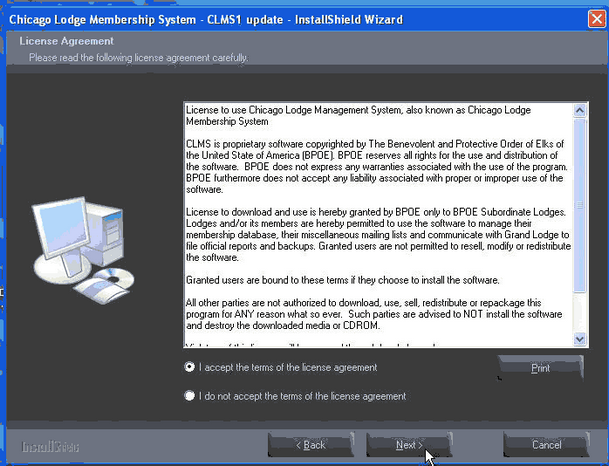
| 6. | Select the radio button for I accept the terms of the license agreement, then click the Next button to continue the install process. |
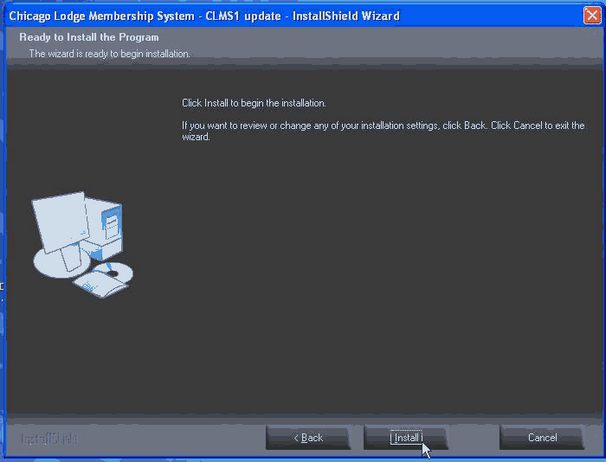
| 7. | Now you will see a window indicating that the Install wizard is Ready to install the Program click theInstall button at this time. |
| 8. | A Setup Status window will briefly appear you do not need to do anything at this point. 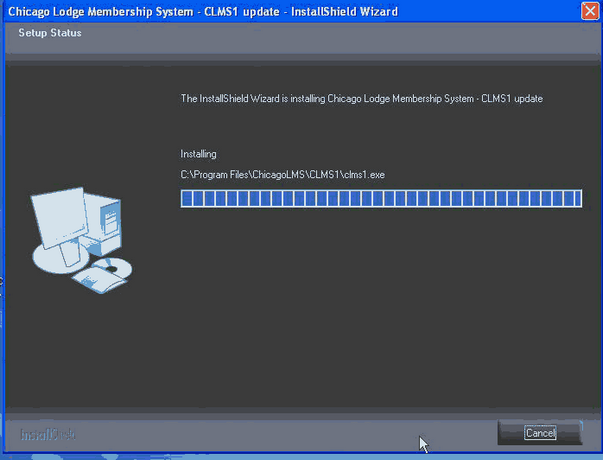 |
| 9. | Finally you will get a window indicating that InstallSheild Wizard Complete now you can click on the "Finish button to complete the Update installation. |

Section 2 Not Installing Now
You have selected the No button from the Update Available message box and chosen to not to let an update run, perhaps because you need to make a current backup.
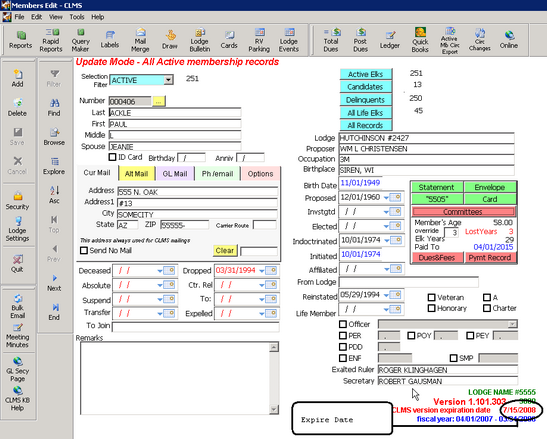
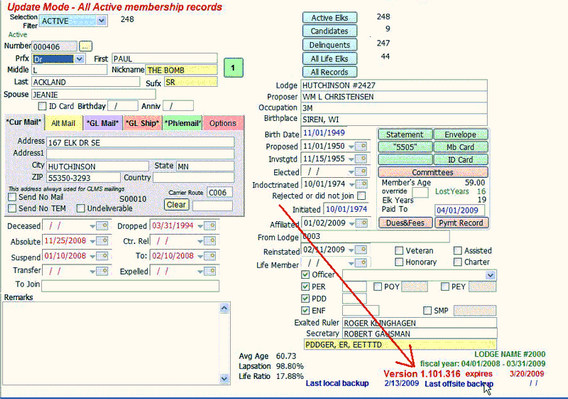
| 1. | You can keep using your current version of CLMS1, however once youre current version has come within 15 days of its expiration date you will be reminded to allow the update to be performed see step 2. The expiration date is located in the lower right hand portion of the Members Edit screen. |
| 2. | You will see messages once you have come within 15 days of the expiration date as shown below expires on June 30th 2008. |
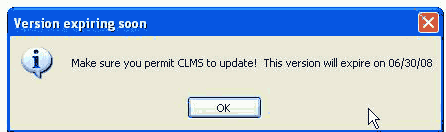
A subsequent message box informs you that you have X amount of days before your version will expire. Now would be a good time to install.
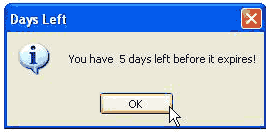
| 3. | If you choose to ignore these warnings you will eventually get a Version has expired message box when the expiration date has passed. Please note that CLMS1 updates to the application must be performed consecutively. |

So if you allow several updates to pass without updating it is best to un-install your current version and re-install the latest version once again performing a backup is imperative before taking this action.
Section 3 File Error
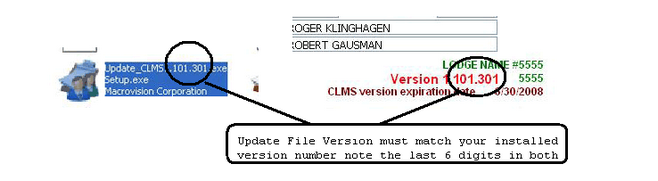
| 1. | Locate your version number of CLMS currently installed. This can be found in the lower right hand corner of the "Members Edit" screen. Record this number as it will be important later on in this section. |
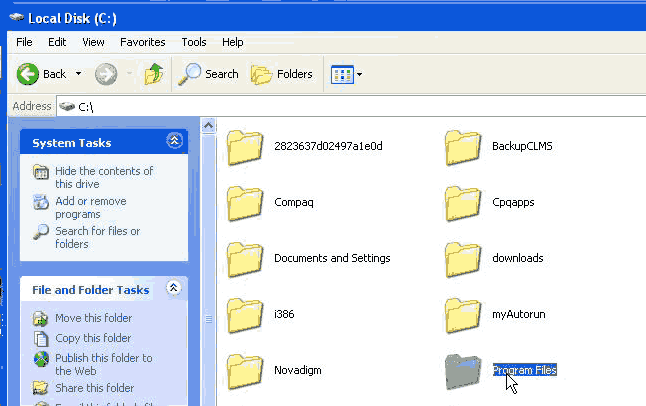
| 2. | Locate the My Computer icon on your desk top and double left click on it. |

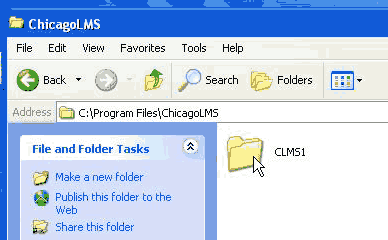
| 3. | Locate and double click on the Program Files folder. |
| 4. | Double click on the ChicagoLMS folder. |
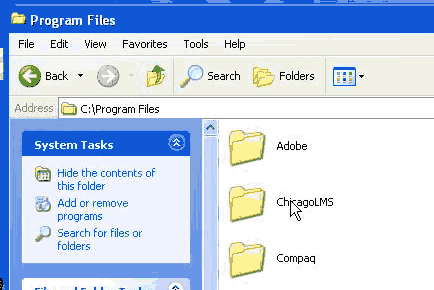
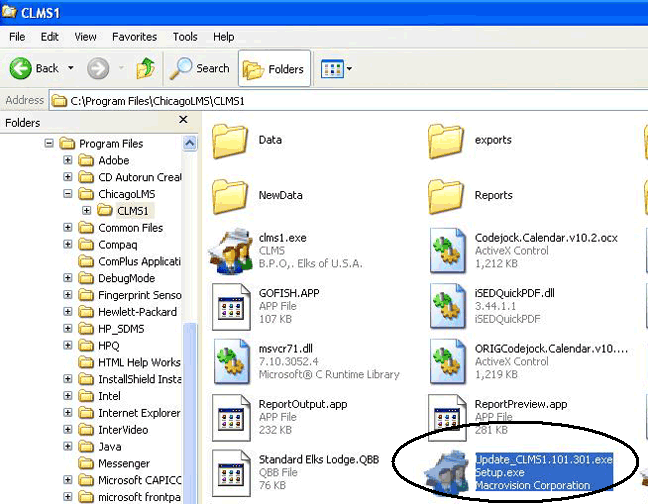
| 5. | Double click on the CLMS1 folder |
| 6. | Locate the file "Update_CLMS1.101.xxx.exe", where "xxx" represents your current version of "CLMS". The file can be found in the "CLMS" folder as shown below. Double-click on the file to start the install. Note the Update's version number including last three digits represented by the three "x" characters, should match your current version numbers number. |
| 7. | Resume instructions in Section 1 - Regular Install starting at 5. |
![]()
Suggestions or bug reports about the CLMS product or help can be emailed to CLMS Helpdesk.
© B.P.O. Elks of U.S.A. All rights reserved.
Page url: http://www.YOURSERVER.com/index.html?updating_clms.htm